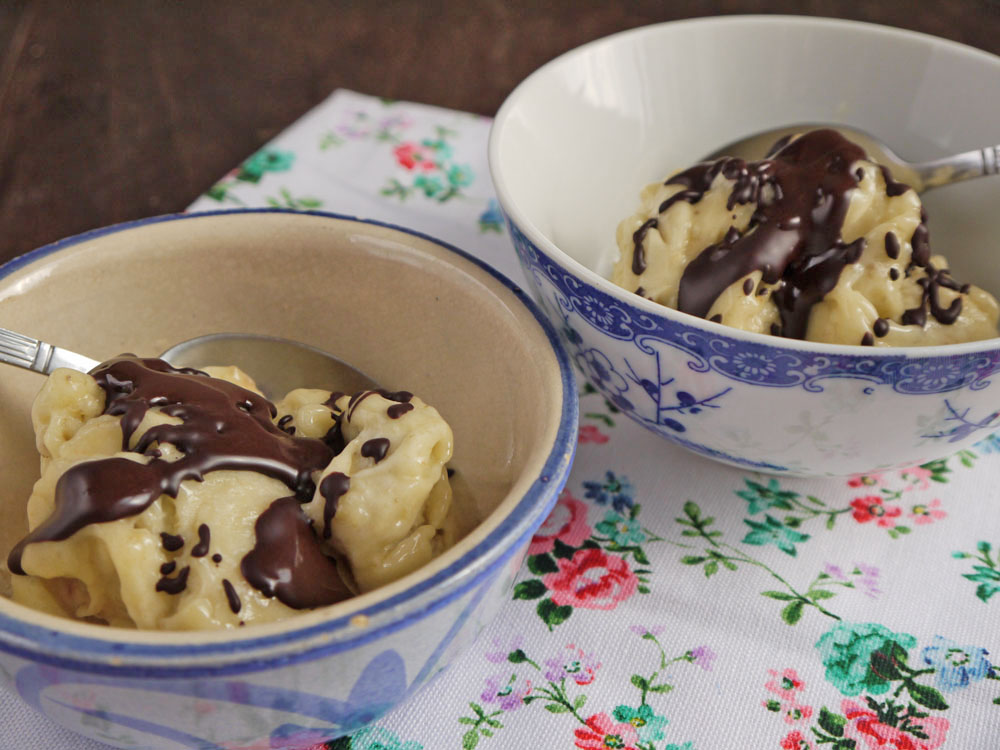
The weather has been so amazing recently it feels like spring is finally here and soon it will be summer when thoughts turn of course to ice cream. This ice cream is quite simply genius. The only ingredient you need is one banana per person. Peel it, chop it up, put it on a plate and freeze it for a couple of hours. Chuck it in the food processor and voila...banana ice cream. The idea came from The Kitchn and you can find more detailed step by step instruction here. I couldn’t resist adding some chocolate sauce to ours by melting a couple of squares of 70% dark chocolate in a bowl over a pan of boiling water. The real bonus is that all you are doing is eating a banana...ice cream without the mega calories!
Banana Ice Cream with Chocolate Sauce
Tuesday, 27 March 2012
Tomato, Ricotta and Basil Pasta...an antidote to the hairdressers
Friday, 23 March 2012
There are many things in life I’m not good at, I won’t bore you with a list but going to the hairdressers is definitely on it. This morning I faced another torturous visit after a very long three month gap (it was actually four but the hair dresser doesn’t need to know that). How I hate sitting in the chair, making small talk while trying to look normal and relaxed as I peer at the blurred image in front of me. I wear glasses so without them I can’t see what the heck is going on. I just have to wait it out and hope for the best. These days it doesn’t really bother me, I leave feeling relieved and high tail it home avoiding all mirrors until I have washed all the gunk I just paid for out of my hair and then dried it in my own unique fashion. Long gone are the days when a trip to the hairdressers meant several hours of tears and tantrums. Instead, arriving home starving hungry, I rewarded myself with this incredibly simple and tasty tomato pasta dish of plum tomatoes, garlic, ricotta and basil. The weather has been so lovely and sunny the last few days I am beginning to crave summer flavours. The combination of tomato and basil just says summer to me. The best bit...you can leave the sauce simmering away on the stove while you go and sort out your hair disasters.
The recipe comes from Luisa of The Wednesday Chef featured on A Cup of Jo You can get the recipe here. I stuck to the recipe but used one clove of garlic instead of two as we like to go easy on the garlic in this house. I also obviously used gluten free pasta. It really is an easy, after work quick dinner that is filling and tasty. Bon appétit x
Pear Polenta Cake
Thursday, 15 March 2012
Things have been a little on the healthy side around here lately so I thought it was about time I made a cake. My husband took the cake in to work after we’d had a couple of slices and it was gone before he even got down for tea break. That’s how good it is... but then he did say that teachers will eat anything. The pears are sweet and lend moisture to the cake while the slight tartness of the blueberries tempers this and stops the cake being too sweet. I reduced the sugar considerably from the original recipe and still found the cake was plenty sweet enough. I used frozen blueberries which seemed to sink in to the middle. I’m sure fresh blueberries would stay neatly in place.
Recipe adapted from Seriously Good Gluten Free Baking by Phil Vickery.
Olive oil for oiling
3 ripe pears
Grated zest of ½ a lemon
175g (6oz) unsalted butter
150g (5oz) golden caster sugar (the original recipe says 225g but I reduced this, it seemed like a lot to a health freak like me).
3 medium eggs beaten
1 teaspoon vanilla extract
3 teaspoons gluten free baking powder
250g (9oz) polenta (make sure it’s gluten free)
100g (4oz) blueberries (I used frozen)
Preheat oven gas mark 4 (180°C 350°F). Oil or line a 22cm square baking tin with parchment.
Peel the pears and slice in to chunks. Place the unsalted butter and sugar in a mixing bowl and cream together. Add the eggs, the lemon zest, the vanilla extract, baking powder and polenta and mix until well combined. Fold in the pears. Spoon the mixture in to the baking tin and smooth. Press the blueberries in a single layer on top.
Bake for 30 minutes until golden and a skewer inserted in to the middle comes out clean. My cake actually took nearly an hour but I do have a very rubbish oven.
Cherry Rice Bowl
Friday, 9 March 2012
Cherries are so good...I once made myself sick as a kid eating a whole punnet full. I also had a dangerous addiction to cherry lattice pie which was shop bought and full of e-numbers. I was a hyperactive nightmare after I’d stuffed that down. These days I’ve scaled my cherry addiction way back. I usually try to eat in season and it is very early for cherries but when I saw this recipe I couldn’t resist making it for my lunch at the weekend. I knew it would be good and I was not disappointed. Everything I’ve made from Heidi Swanson has always turned out perfectly. I love a good rice bowl and have become quite obsessed with fruit and nuts mixed in with rice. They complement each other so well, especially when combined with nutty wholegrain rice and tangy feta cheese.
The recipe includes a cherry vinaigrette to combine with this salad so I have noted down the ingredients here but I didn’t actually make it. I found the salad plenty tasty enough on its own.
Recipe slightly adapted from Super Natural Every Day by Heidi Swanson
Serves 2
100g (4oz) rice (I used a mix of brown rice, wild rice and red camargue rice)
1 – 2 handfuls of baby spinach
50g (2oz) walnut pieces toasted (I used a mix of pecans and walnuts)
50g (2oz) cherries pitted and chopped in half
A few basil leaves
Feta cheese crumbled
*For the vinaigrette mix 1/3rd of the cherries, olive oil and white wine vinegar in a blender until smooth.
Cook the rice according to the pack instructions. In a large bowl combine the hot rice, spinach and walnuts, allow the spinach to wilt slightly. Serve in bowls and top with the cherries, basil and feta cheese. Drizzle with the vinaigrette and serve.
Celeriac Chips
Saturday, 3 March 2012
Right now I have honking garlic breath, this has nothing to do with celeriac chips but I felt like sharing. I was trying out a new pasta recipe. It won’t be finding its way on here unless I manage to perfect it. In order to try and rid myself of the garlic taste I’ve brushed my teeth, (obvious remedy) then resorted to chocolate (slightly less obvious but it makes me feel better). Garlic is still all I can taste.
Anyway, back to celeriac chips. Celeriac is one of my favourite winter vegetables alongside parsnips. It doesn’t look too handsome but it tastes amazing. My favourite cooking method is roasting but it can be mashed and also makes a good soup too. Here I decided to make some chips and it worked really well.
1 x Celeriac
1 teaspoon dried rosemary
Olive oil
Preheat the oven to gas mark 6, 200°C. Peel the celeriac and chop up in to chip shapes. Line a baking sheet with parchment. Place celeriac chips in a saucepan, cover with cold water and bring to the boil (add salt if you like). Once the water has reached boiling point take a colander and drain the chips. Place the chips on the baking sheet, sprinkle with rosemary and drizzle with olive oil. Place in the oven for approx 30 minutes turning half way through cooking. Roast until golden brown.
Quinoa, Fennel and Pomegranate Salad
Saturday, 25 February 2012
I saw this salad in Bon Appétit and the colours just immediately jumped out at me. I knew I had to make a version of this. My recipe is a bit of a thrown together affair with the ingredients I had to hand. I ended up with a fresh tasting salad with a hint of lemon which wasn’t over powering and which worked really well with the mint. It was a delicious light lunch and perfect for this unusually warm and sunny February day. I enjoyed mine while listening to a bit of Bruce Springsteen but that part is totally optional.
Serves 2
100g (4oz) ½ cup quinoa rinsed
250ml or 1 cup water
1 x fennel bulb fronds removed
Pomegranate seeds
1 tablespoon of lemon juice
Zest of half a lemon
½ teaspoon of dried rosemary
Handful of fresh mint chopped
Preheat the oven to gas mark 6, 200°C. Remove the stalks from the fennel and chop the bulb in to chunks. Drizzle with olive oil and sprinkle over the rosemary. Roast for 30-35 minutes until golden brown and cooked through. Meanwhile place the quinoa in a saucepan and add the water. Bring to the boil and simmer for 10-15 minutes. Once cooked drain any excess water and fluff with a fork. Mix in the lemon juice and zest and set aside covering with a lid to keep warm. When the fennel is cooked mix it with the quinoa and add a squeeze more lemon juice to taste. Serve on a plate and sprinkle with pomegranate seeds and fresh mint.
Pancakes...again!
Monday, 20 February 2012
Since tomorrow is Shrove Tuesday I thought I’d slip another pancake recipe in. It was a bit of a pancake extravaganza in our house this weekend. This is another recipe taken from Phil Vickery’s Seriously Good Gluten-Free Baking. My pancakes didn’t really turn out like the pictures in the book but I was impressed with the pretty patterns they made. We had our pancakes stuffed with bananas (we like bananas in this house) and topped with sheep yoghurt and pomegranate seeds which added a lovely touch of colour. I’m sure the traditional sugar and lemon topping would work well too. I made the pancakes dairy free by using rice milk which worked well although it is a little more watery than cow’s milk. Sheep milk yoghurt is a delicious alternative for those who are intolerant to cow’s milk. It is really thick and creamy.
Recipe from Seriously Good Gluten-Free Baking by Phil Vickery. Makes 4-6 pancakes
90g (3 ½ oz) brown rice flour
35g (1 ½ oz) cornflour
2 medium free range eggs
200ml milk (I used rice milk)
Olive oil for greasing the pan
In a large jug or mixing bowl mix together the flours. Add the eggs one by one whisking well, then add about three quarters of the milk and combine. The batter should be fairly runny (consistency of double cream). Add more milk if necessary.
Heat the oil in a skillet or non stick frying pan. Pour in about 4 tablespoons of batter and swirl it round to cover the base. Cook for 30 to 60 seconds and as the pancake begins to set loosen the edges with a spatula. Once the pancake is set turn it over and cook the other side until golden. Repeat until all the batter is used up.
Oh and I didn’t flip my pancakes, my official excuse is the skillet is too heavy for my wimpy arms but really I’m one of the most accident prone people I know. I didn’t want to risk wasting a single yummy pancake with batter all over the floor.
Subscribe to:
Posts (Atom)
Design by SkyandStars.co | BACK TO TOP