Showing posts with label Jam. Show all posts

Gooseberry, But Not the Fool

Friday, 2 August 2013


Over the summer my husband is assisting on a feature film and as I type this, a film crew is in my back garden filming a scene in which a girl is offered drugs at a family BBQ.  I don’t know what it is about my back garden that says drug den but I’m trying not to focus on that.  Instead I’m focusing on these gooseberry bars.  For the uninitiated gooseberries are a summer fruit native to Europe.  They are quite tart in flavour and most often eaten in crumbles or in the gooseberry fool which is a well known English dessert although having said that I’ve never actually eaten one.  Apparently they have been popular in England as far back as the reign of Elizabeth 1st. 


When a friend gave us a big bowl full of gooseberries from his garden my first instinct was hooray, free food and secondly to make a crumble but my husband pulls a face every time I mention crumble.  He is not a fan.  However he has no problem at all with crumble bars.  I know what you are thinking.  Surely the leap from crumble to crumble bar can’t be that big but apparently it is.  So when I saw a delicious looking recipe for raspberry breakfast bars from Jeanette at Everybody Likes Sandwiches I thought it looked like the perfect vehicle for my gooseberries.  It worked really well.  I had to substitute gluten free brown rice flour for the spelt flour which did lend a fairly crumbly texture but if you keep them in the fridge they hold together reasonably well.  They are delicious without being overly sweet and the tartness of the gooseberries is counteracted once they are cooked.  I should have done a layer of jam as was recommended in the recipe but sadly I was out of jam that day.  Maybe I should have made some gooseberry jam too!


Recipe adapted from Everybody Likes Sandwiches.
1 cup/115g/4 ½ oz brown rice flour
1 cup/100g/4oz gluten free oats
½ cup/50g/2oz ground almonds
½ cup/25g/1oz toasted coconut flakes
1/3 cup/60g/2 ½ oz brown sugar
½ tsp cinnamon
½ tsp nutmeg
¼ tsp salt
 ½ cup coconut oil, melted
1 large egg
½ tsp vanilla extract
2-3 cups/300g/10oz gooseberries washed, stems removed.  I kept most of mine whole but you can cut them in half if you prefer.
1 tablespoon demerara sugar for sprinkling.

Preheat oven to Gas Mark 4, 180°C, 350°F.  Line an 8x8 pan or I used an 11 x 6 pan with parchment letting the edges hang over to form a sling.

In a mixing bowl combine the flour, oats, ground almonds, toasted coconut, sugar, cinnamon, nutmeg and salt.  Next add the coconut oil, egg and vanilla extract and combine until a crumbly dough forms.  Reserve ¾ cup of dough to one side and press the rest in to the bottom of your pan.  Scatter the gooseberries across the dough then top with the rest of the reserved dough in rough clumps.  Finally sprinkle with demerara sugar.  Bake for 30-40 minutes until golden brown.  Let the pan cool on a wire rack for 20 minutes then remove the bars from the pan using your parchment sling.  Allow to cool completely before cutting in to squares.  Store the bars in the refrigerator.


Blueberry Scones

Saturday, 16 March 2013

When the weather is this grim I think scones are in order.  They are the perfect embodiment of summer days with thoughts of cream teas but also have the advantage of being great comfort food on a blustery cold day.  Today is definitely a day for staying in and baking.  I know spring is supposedly out there somewhere but with the snow earlier in the week and now the downpours of heavy rain I’m having a hard time believing it. 

The scones are buttery and light just as a scone should be.  They can be whipped up in a few minutes and only take 10-15 minutes to bake.  You can pretty much be eating a scone within half an hour if you are quick.  This is a versatile recipe which I’ve blogged about before using dried fruit in the scones.  This time I used less xanthan gum which I’m never convinced is necessary in baking.  Next time I make these I will try leaving it out altogether.  I made these with frozen blueberries which I thawed before mixing in.  Because they were frozen the berries left lovely streaks of colour through the scones.  Serve warm with butter and jam or eat them as they are.
Slightly adapted from Healthy Gluten Free Eating by Darina Allen and Rosemary Kearney
275g/10oz brown rice flour
50g /2oz tapioca flour
4 teaspoons gluten free baking powder
1 teaspoon xanthan gum
1 teaspoon salt
2 tablespoons organic golden caster sugar
110g/4oz butter diced
110g/4oz blueberries fresh or frozen (I used frozen berries which I thawed first).
2 eggs
175ml/6fl oz natural yoghurt (I used sheep milk yoghurt)
Egg wash
Directions:
Preheat the oven to gas mark 9, 250°C
Sift the dry ingredients in to a large bowl and mix well. Add the butter and rub in to the flour to form breadcrumbs.  Gently fold in the blueberries.  In a separate bowl whisk the eggs and yoghurt until well combined. Make a well in the centre of the flour and pour in the egg and yoghurt mixture.  Combine to make a soft dough.
Turn the dough out on to a rice floured surface and knead gently. Shape the dough in to a round and roll out to about 2.5cm thick. Using a 5cm cutter stamp out the scones and place them on a rice floured baking sheet. Brush with egg wash.
Bake for 10-15 minutes until golden brown on top. Move the scones to a wire rack to cool.
Makes 15 to 18 scones.


17 years

Saturday, 9 March 2013

I made Sarah B’s Life Changing Loaf from My New Roots.  It’s been all over the internet in food blog land and I’m not surprised.  It’s one of those rare things that comes along and you just know you have to give it a try.  The ingredients may seem a little obscure or hard to come by.  I actually had them all in my cupboards but I know that they are not your everyday items.  Health foods can be pricey but then things that are good for you seem to come with an expensive price tag which has always seemed back to front to me.  We are lucky enough to have a good health food store near us where such items are available. 
 
I’m not going to say much more about the loaf.  I think you should read Sarah B’s post.  I enjoyed the loaf very much.  Toasting it makes the best of the nuts and seeds and brings out that lovely aroma giving the bread a nice crunch.  Be prepared for the odd seeds to get stuck in your teeth or maybe that’s just me.  Speaking of life changing events, yesterday was 17 years since my first date with my husband.  Who knew that the boy who saved my seat each week in our drama class would end up making my life so incredibly happy.  As I recall when he asked me out I choked on my bottle of beer which is always an attractive look.  Since I’m coeliac there’s no beer these days but I’m still more than capable of embarrassing myself in other ways.


Almond Butter and Jam Sandwich Biscuits

Wednesday, 2 May 2012

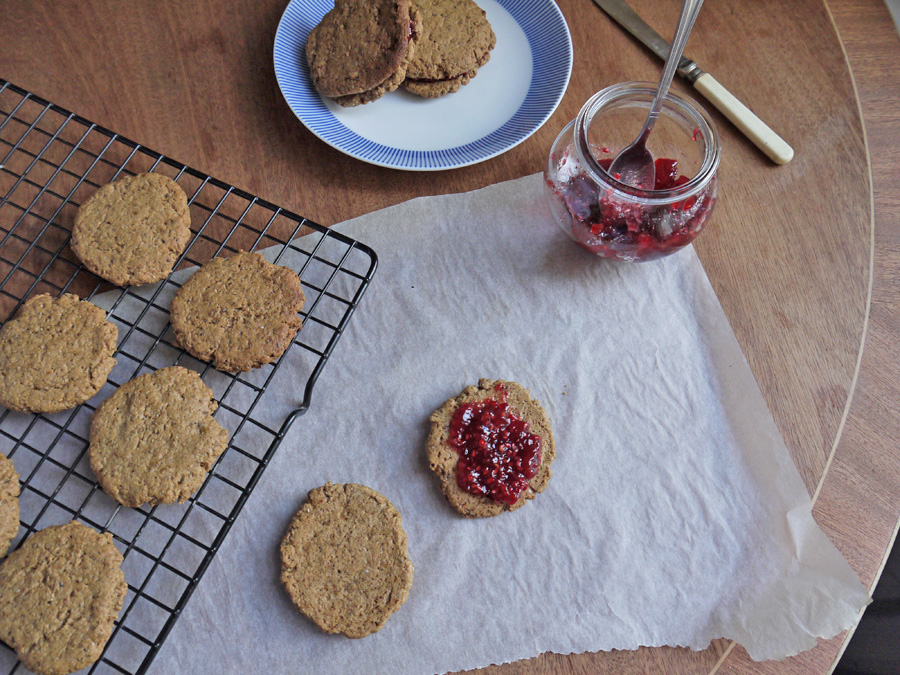
You wouldn’t believe the time I wasted deliberating over whether to call these biscuits or cookies.  Obviously being a native of this fair isle we call the United Kingdom I was thinking biscuit.  I started pondering other sandwich biscuits like jammie dodgers, custard creams or bourbons.  Sorry to disappoint but these biscuits taste nothing like any of those.  In my book they taste better but then it is a very long time since I have eaten those biscuits.  That would be back in my heady gluten eating days.  Whether I call them cookies or biscuits it makes absolutely no difference to how good they taste.  I just had to have mine with a cup of tea.

The recipe comes from the fabulous blog by Sarah Britton called My New Roots.  She always conjures up amazing tasting healthy treats.  The ingredients for these biscuits include some of my favourite things, namely almond butter which I could eat by the truck load and maple syrup.  I realise ingredients for healthy baking can be a little pricey.  I did shell out for some chia seeds as I have wanted to try them in my baking for a long time but I subbed the coconut palm sugar for unrefined golden caster sugar to keep costs down.  I also used store bought almond butter but it’s on my list to try making my own.  You should be able to get all these ingredients from your local health food shop.  I followed Sarah’s recipe using strawberry jam as my filling.  You can get the full recipe here.


Jam Story

Thursday, 20 October 2011

A few weeks ago towards the end of summer we decided to go blackberry picking on the downs. This year the blackberries seemed to be early and in huge abundance.  We came back with several containers of all shapes and sizes loaded with black ripe juicy berries.  I didn’t know what I wanted to make but for some reason I decided on blackberry jam.  I had never made jam before and I don’t know why I thought it would be a good time to start when I was already cooking dinner late on a Sunday afternoon.


The process was surprisingly quick and easy.  The recipe below is faithful to the original but also open to being adapted.  I decided to halve the recipe since it was all a bit of an experiment and put the leftover berries in the freezer.  I also discovered that I didn’t have enough sugar or the right sort so ended up reducing the sugar amount by a third which suited my healthy sensibilities.  You may not know this...but jam contains A LOT of sugar.  Watching the sheer amount of the stuff as I weighed it out on the scales was scary.   I ended up using half granulated brown sugar and half demerara.  The end result didn’t seem to suffer for this.  In fact my husband, who never eats jam unless a scone is involved, became a jam eating monster.  I’d never seen him consume so much jam on toast.


Makes 1.2 litres/4 jam jars
900g/2lb fruit
900g/2lb sugar
1 ½ tbsp lemon juice
Put the blackberries in to a heavy based saucepan or if you are really flash a preserving pan.
Add 50ml of water and 1 ½ tbsp of lemon juice.  Bring to the boil.
Simmer for 15 minutes until the fruit is soft.
Pour in the sugar and stir over a low heat until it has dissolved then turn up the heat to bring it to a full rolling boil for about 15 minutes.  Do not stir until the setting point of 105°C is reached.  (I ended up boiling mine for about 20 minutes before reaching setting point.  You may find yours takes a longer or shorter time.)
Remove the pan from the heat and skim off any excess scum.  Leave for about 15 minutes before pouring in to sterilized jars, label and seal.
Some extra notes:
I don’t have a jam thermometer so I used the frozen plate method.  Place a plate in the freezer until it is nice and cold.  To test if your jam has reached setting point remove the plate from the freezer, take a small dollop of jam from your boiling pot and drop it onto the plate, if it sets then it’s ready, if it remains runny then keep boiling the jam and try again in a few minutes.  I found this took several attempts.
I am not an expert on sterilizing jars.  You can find many different methods by looking this up online.  I’d hate to think I’d given you rogue jam jar sterilizing advice.